Collaborative Software Development Using Git and GitHub
Overview
Teaching: 35 min
Exercises: 0 minQuestions
What are Git branches and why are they useful for code development?
What are some best practices when developing software collaboratively using Git?
Objectives
Commit changes in a software project to a local repository and publish them in a remote repository on GitHub
Create branches for managing different threads of code development
Learn to use feature branch workflow to effectively collaborate with a team on a software project
Introduction
So far we have checked out our software project from GitHub and used command line tools to configure a virtual environment for our project and run our code. We have also familiarised ourselves with PyCharm - a graphical tool we will use for code development, testing and debugging. We are now going to start using another set of tools from the collaborative code development toolbox - namely, the version control system Git and code sharing platform GitHub. These two will enable us to track changes to our code and share it with others.
You may recall that we have already made some changes to our project locally - we created a virtual
environment in the directory called “venv” and exported it to the requirements.txt file.
We should now decide which of those changes we want to check in and share with others in our team. This is a typical
software development workflow - you work locally on code, test it to make sure
it works correctly and as expected, then record your changes using version control and share your work with others
via a shared and centrally backed-up repository.
Sharing Sensitive Information on GitHub
As part of this course we are not working or sharing any sensitive data. However, you should still be careful not to upload any AstraZeneca-related work to a public repository outside the AstraZeneca Enterprise GitHub and follow AstraZeneca guidelines on using GitHub.
Firstly, let’s remind ourselves how to work with Git from the command line.
Git Refresher
Git is a version control system for tracking changes in computer files and coordinating work on those files among multiple people. It is primarily used for source code management in software development but it can be used to track changes in files in general - it is particularly effective for tracking text-based files (e.g. source code files, CSV, Markdown, HTML, CSS, Tex, etc. files).
Git has several important characteristics:
- support for non-linear development allowing you and your colleagues to work on different parts of a project concurrently,
- support for distributed development allowing for multiple people to be working on the same project (even the same file) at the same time,
- every change recorded by Git remains part of the project history and can be retrieved at a later date, so even if you make a mistake you can revert to a point before it.
The diagram below shows a typical software development lifecycle with Git and the commonly used commands to interact with different parts of Git infrastructure, such as:
- working directory - a directory (including any subdirectories) where your project files live and where you are currently working.
It is also known as the “untracked” area of Git. Any changes to files will be marked by Git in the working directory.
If you make changes to the working directory and do not explicitly tell Git to save them - you will likely lose those
changes. Using
git add filenamecommand, you tell Git to start tracking changes to filefilenamewithin your working directory. - staging area (index) - once you tell Git to start tracking changes to files (with
git add filenamecommand), Git saves those changes in the staging area. Each subsequent change to the same file needs to be followed by anothergit add filenamecommand to tell Git to update it in the staging area. To see what is in your working directory and staging area at any moment (i.e. what changes is Git tracking), run the commandgit status. - local repository - stored within the
.gitdirectory of your project, this is where Git wraps together all your changes from the staging area and puts them using thegit commitcommand. Each commit is a new, permanent snapshot (checkpoint, record) of your project in time, which you can share or revert back to. - remote repository - this is a version of your project that is hosted somewhere on the Internet (e.g. on GitHub, GitLab or somewhere else). While your project is nicely version-controlled in your local repository, and you have snapshots of its versions from the past, if your machine crashes - you still may lose all your work. Working with a remote repository involves pushing your changes and pulling other people’s changes to keep your local repository in sync in order to collaborate with others and to backup your work on a different machine.
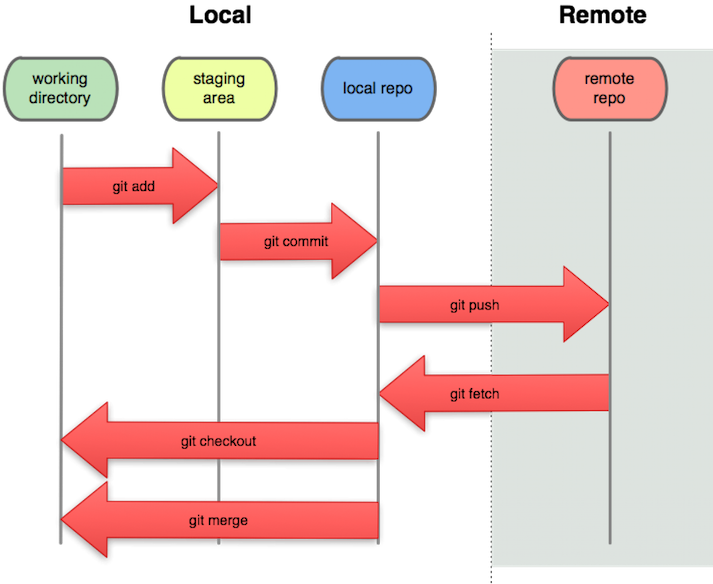
Software development lifecycle with Git from PNGWing
Checking-in Changes to Our Project
Let’s check-in the changes we have done to our project so far. The first thing to do upon navigating into our software project’s directory root is to check the current status of our local working directory and repository.
$ git status
On branch main
Your branch is up to date with 'origin/main'.

Untracked files:
  (use "git add <file>..." to include in what will be committed)
	requirements.txt
	venv/

nothing added to commit but untracked files present (use "git add" to track)
As expected, Git is telling us that we have some untracked files - requirements.txt and directory
“venv” - present in our working
directory which we have not staged nor committed to our local repository yet.
You do not want
to commit the newly created directory “venv” and share it with others because this
directory is specific to your machine and setup only (i.e. it contains local paths to libraries on your
system that most likely would not work on any other machine). You do, however, want to share requirements.txt with
your team as this file can be used to replicate the virtual environment on your collaborators’ systems.
To tell Git to intentionally ignore and not track certain files and directories, you need to specify them in the .gitignore text file in the project root. Our project already has .gitignore, but in cases where you do not have
it - you can simply create it yourself. In our case, we
want to tell Git to ignore the “venv” directory (and “.venv” as another naming convention for directories containing virtual environmentsß)
and stop notifying us about it. Edit your .gitignore
file in PyCharm and add a line containing “venv/” and another one containing “.venv/”. It does not matter much
in this case where within the file you add these lines, so let’s do it at the end. Your .gitignore should look something like this:
# IDEs
.vscode/
.idea/

# Intermediate Coverage file
.coverage

# Output files
*.png

# Python runtime
*.pyc
*.egg-info
.pytest_cache

# Virtual environments
venv/
.venv/
You may notice that we are already not tracking certain files and directories with useful comments about what exactly we are ignoring. You may also notice that each line in .ignore is actually a pattern, so you can ignore multiple files that match a pattern (e.g. “*.png” will ignore all PNG files in the current directory).
If you run the git status command now, you will notice that Git has cleverly understood that you want to ignore changes to the “venv” directory so it is not warning us about it any more. However, it has now detected a change to
.gitignore file that needs to be committed.
$ git status
On branch main
Your branch is up to date with 'origin/main'.

Changes not staged for commit:
  (use "git add <file>..." to update what will be committed)
  (use "git restore <file>..." to discard changes in working directory)
	modified:   .gitignore

Untracked files:
  (use "git add <file>..." to include in what will be committed)
	requirements.txt

no changes added to commit (use "git add" and/or "git commit -a")
To commit the changes .gitignore and requirements.txt to the local repository, we first have to add these files to
staging area to prepare them for committing. We can do that at the same time as:
$ git add .gitignore requirements.txt
Now we can commit them to the local repository with:
$ git commit -m "Initial commit of requirements.txt. Ignoring virtual env. folder."
Remember to use meaningful messages for your commits.
So far we have been working in isolation - all the changes we have done are still only stored locally on our individual
machines. In order to share our work with others, we should push our changes to the remote repository on GitHub. Before we push our changes however, we should first do a git pull. This is considered best practice, since any changes made to the repository - notably by other people - may impact the changes we are about to push. This could occur, for example, by two collaborators making different changes to the same lines in a file. By pulling first, we are made aware of any changes made by others, in particular if there are any conflicts between their changes and ours.
$ git pull
Now we’ve ensured our repository is synchronised with the remote one, we can now push our changes. GitHub has recently strengthened authentication requirements for Git operations accessing GitHub from the command line over HTTPS. This means you cannot use passwords for authentication over HTTPS any more - you either need to set up and use a personal access token for additional security if you want to continue to use HTTPS, or switch to use private and public key pair over SSH before you can push remotely the changes you made locally. So, when you run the command below:
$ git push origin main
Authentication Errors
If you get a warning that HTTPS access is deprecated, or a token is required, then you accidentally cloned the repository using HTTPS and not SSH. You can fix this from the command line by resetting the remote repository URL setting on your local repo:
$ git remote set-url origin git@github.com:<YOUR_GITHUB_USERNAME>/python-intermediate-inflammation.git
In the above command,
origin is an alias for the remote repository you used when cloning the project locally (it is called that
by convention and set up automatically by Git when you run git clone remote_url command to replicate a remote
repository locally); main is the name of our
main (and currently only) development branch.
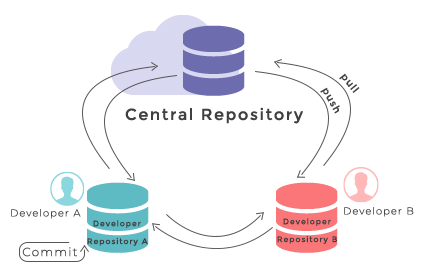
Git Remotes
Note that systems like Git allow us to synchronise work between any two or more copies of the same repository - the ones that are not located on your machine are “Git remotes” for you. In practice, though, it is easiest to agree with your collaborators to use one copy as a central hub (such as GitHub or GitLab), where everyone pushes their changes to. This also avoid risks associated with keeping the “central copy” on someone’s laptop. You can have more than one remote configured for your local repository, each of which generally is either read-only or read/write for you. Collaborating with others involves managing these remote repositories and pushing and pulling information to and from them when you need to share work.
Git - distributed version control system
From W3Docs (freely available)
Git Branches
When we do git status, Git also tells us that we are currently on the main branch of the project.
A branch is one version of your project (the files in your repository) that can contain its own set of commits.
We can create a new branch, make changes to the code which we then commit to the branch, and, once we are happy
with those changes, merge them back to the main branch. To see what other branches are available, do:
$ git branch
* main
At the moment, there’s only one branch (main) and hence only one version of the code available. When you create a
Git repository for the first time, by default you only get one version (i.e. branch) - main. Let’s have a look at
why having different branches might be useful.
Feature Branch Software Development Workflow
While it is technically OK to commit your changes directly to main branch, and you may often find yourself doing so
for some minor changes, the best practice is to use a new branch for each separate and self-contained
unit/piece of work you want to
add to the project. This unit of work is also often called a feature and the branch where you develop it is called a
feature branch. Each feature branch should have its own meaningful name - indicating its purpose (e.g. “issue23-fix”). If we keep making changes
and pushing them directly to main branch on GitHub, then anyone who downloads our software from there will get all of our
work in progress - whether or not it’s ready to use! So, working on a separate branch for each feature you are adding is
good for several reasons:
- it enables the main branch to remain stable while you and the team explore and test the new code on a feature branch,
- it enables you to keep the untested and not-yet-functional feature branch code under version control and backed up,
- you and other team members may work on several features at the same time independently from one another,
- if you decide that the feature is not working or is no longer needed - you can easily and safely discard that branch without affecting the rest of the code.
Branches are commonly used as part of a feature-branch workflow, shown in the diagram below.

Git feature branches
Adapted from Git Tutorial by sillevl (Creative Commons Attribution 4.0 International License)
In the software development workflow, we typically have a main branch which is the version of the code that
is tested, stable and reliable. Then, we normally have a development branch
(called develop or dev by convention) that we use for work-in-progress
code. As we work on adding new features to the code, we create new feature branches that first get merged into
develop after a thorough testing process. After even more testing - develop branch will get merged into main.
The points when feature branches are merged to develop, and develop to main
depend entirely on the practice/strategy established in the team. For example, for smaller projects (e.g. if you are
working alone on a project or in a very small team), feature branches sometimes get directly merged into main upon testing,
skipping the develop branch step. In other projects, the merge into main happens only at the point of making a new
software release. Whichever is the case for you, a good rule of thumb is - nothing that is broken should be in main.
Creating Branches
Let’s create a develop branch to work on:
$ git branch develop
This command does not give any output, but if we run git branch again, without giving it a new branch name, we can see
the list of branches we have - including the new one we have just made.
$ git branch
    develop
  * main
The * indicates the currently active branch. So how do we switch to our new branch? We use the git checkout
command with the name of the branch:
$ git checkout develop
Switched to branch 'develop'
Create and Switch to Branch Shortcut
A shortcut to create a new branch and immediately switch to it:
$ git checkout -b develop
Updating Branches
If we start updating and committing files now, the commits will happen on the develop branch and will not affect
the version of the code in main. We add and commit things to develop branch in the same way as we do to main.
Let’s make a small modification to inflammation/models.py in PyCharm, and, say, change the spelling of “2d” to
“2D” in docstrings for functions daily_mean(), daily_max() and daily_min().
If we do:
$ git status
   On branch develop
   Changes not staged for commit:
     (use "git add <file>..." to update what will be committed)
     (use "git checkout -- <file>..." to discard changes in working directory)

   	modified:   inflammation/models.py

   no changes added to commit (use "git add" and/or "git commit -a")
Git is telling us that we are on branch develop and which tracked files have been modified in our working directory.
We can now add and commit the changes in the usual way.
$ git add inflammation/models.py
$ git commit -m "Spelling fix"
Currently Active Branch
Remember,
addandcommitcommands always act on the currently active branch. You have to be careful and aware of which branch you are working with at any given moment.git statuscan help with that, and you will find yourself invoking it very often.
Pushing New Branch Remotely
We push the contents of the develop branch to GitHub in the same way as we pushed the main branch. However, as we have
just created this branch locally, it still does not exist in our remote repository. You can check that in GitHub by
listing all branches.
To push a new local branch remotely for the first time, you could use the -u switch and the name of the branch you
are creating and pushing to:
$ git push -u origin develop
Git Push With
-uSwitchUsing the
-uswitch with thegit pushcommand is a handy shortcut for: (1) creating the new remote branch and (2) setting your local branch to automatically track the remote one at the same time. You need to use the-uswitch only once to set up that association between your branch and the remote one explicitly. After that you could simply usegit pushwithout specifying the remote repository, if you wished so. We still prefer to explicitly state this information in commands.
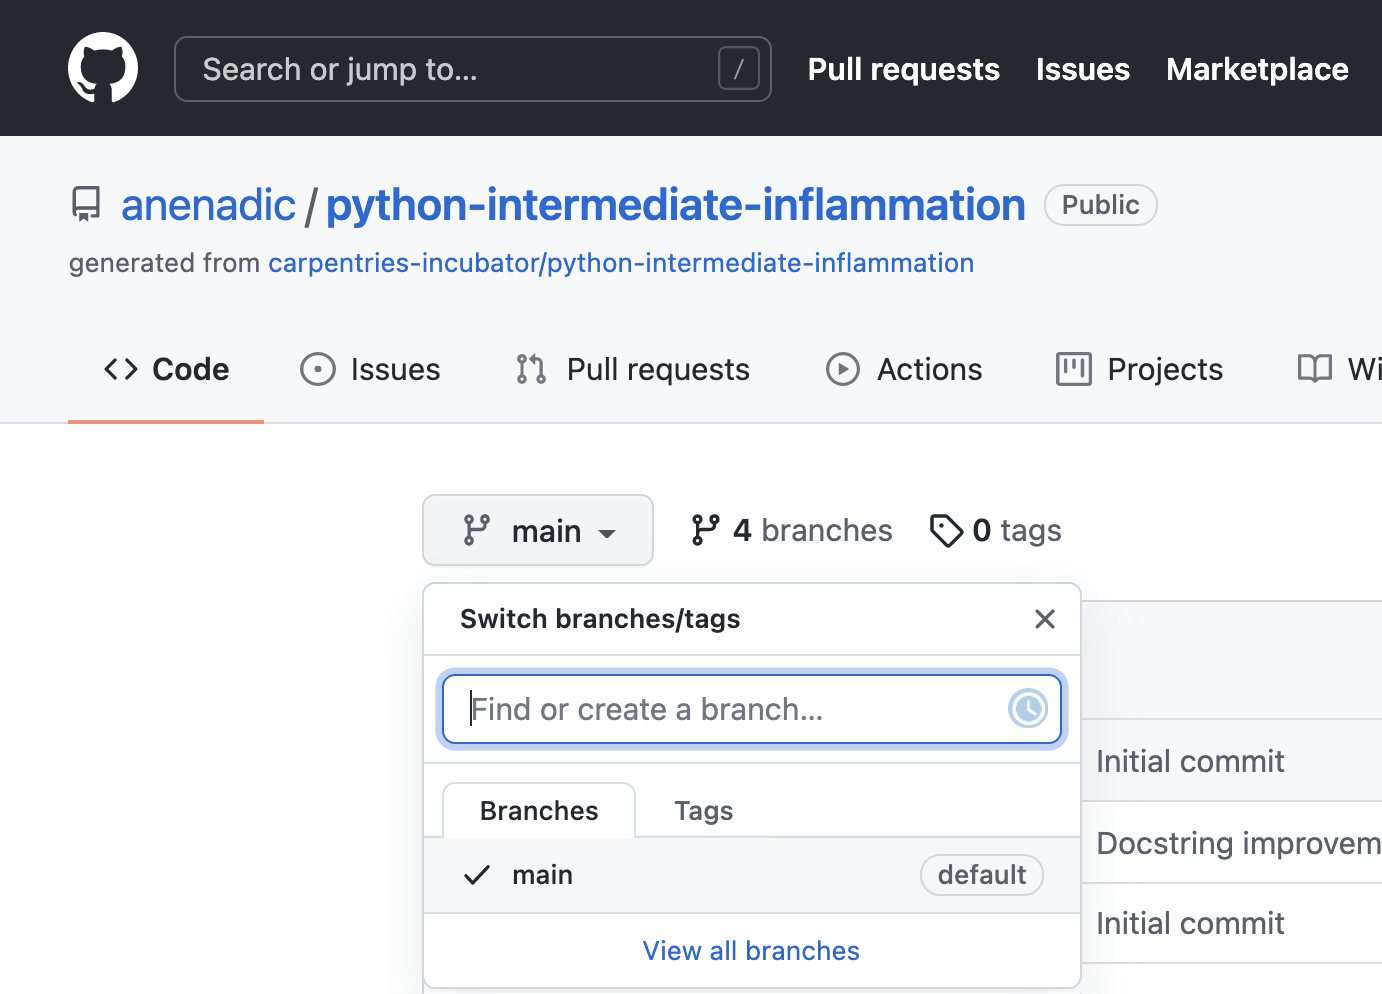
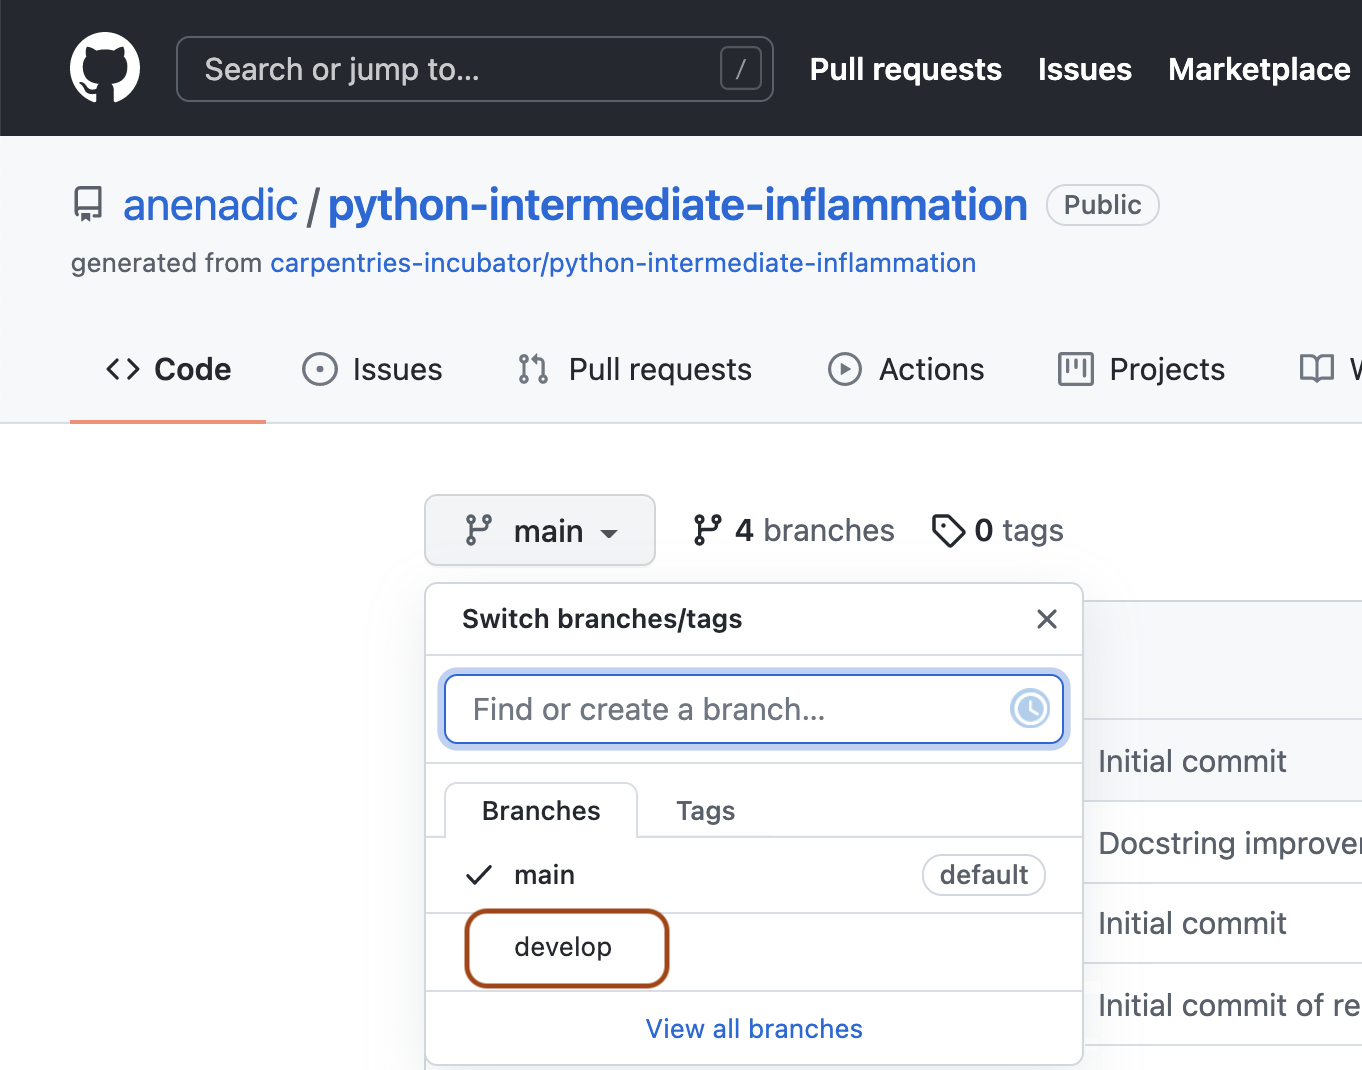
Let’s confirm that the new branch develop now exist remotely on GitHub too. From the < > Code tab in your
repository in GitHub, click the branch dropdown menu (currently showing the default branch main). You should
see your develop branch in the list too.
Now the others can check out the develop branch too and continue to develop code on it.
After the initial push of the new
branch, each next time we push to it in the usual manner (i.e. without the -u switch):
$ git push origin develop
What is the Relationship Between Originating and New Branches?
It’s natural to think that new branches have a parent/child relationship with their originating branch, but in actual Git terms, branches themselves do not have parents but single commits do. Any commit can have zero parents (a root, or initial, commit), one parent (a regular commit), or multiple parents (a merge commit), and using this structure, we can build a ‘view’ of branches from a set of commits and their relationships. A common way to look at it is that Git branches are really only lightweight, movable pointers to commits. So as a new commit is added to a branch, the branch pointer is moved to the new commit.
What this means is that when you accomplish a merge between two branches, Git is able to determine the common ‘commit ancestor’ through the commits in a ‘branch’, and use that common ancestor to determine which commits need to be merged onto the destination branch. It also means that, in theory, you could merge any branch with any other at any time… although it may not make sense to do so!
Merging Into Main Branch
Once you have tested your changes on the develop branch, you will want to merge them onto the main branch.
To do so, make sure you have all your changes committed and switch to main:
$ git checkout main
Switched to branch 'main'
Your branch is up to date with 'origin/main'.
To merge the develop branch on top of main do:
$ git merge develop
Updating 05e1ffb..be60389
Fast-forward
 inflammation/models.py | 6 +++---
 1 files changed, 3 insertions(+), 3 deletions(-)
If there are no conflicts, Git will merge the branches without complaining and replay all commits from
develop on top of the last commit from main. If there are merge conflicts (e.g. a team collaborator modified the same
portion of the same file you are working on and checked in their changes before you), the particular files with conflicts
will be marked and you will need to resolve those conflicts and commit the changes before attempting to merge again.
Since we have no conflicts, we can now push the main branch to the remote repository:
git push origin main
All Branches Are Equal
In Git, all branches are equal - there is nothing special about the
mainbranch. It is called that by convention and is created by default, but it can also be called something else. A good example isgh-pagesbranch which is the main branch for website projects hosted on GitHub (rather thanmain, which can be safely deleted for such projects).
Keeping Main Branch Stable
Good software development practice is to keep the
mainbranch stable while you and the team develop and test new functionalities on feature branches (which can be done in parallel and independently by different team members). The next step is to merge feature branches onto thedevelopbranch, where more testing can occur to verify that the new features work well with the rest of the code (and not just in isolation). We talk more about different types of code testing in one of the following episodes.
Key Points
A branch is one version of your project that can contain its own set of commits.
Feature branches enable us to develop / explore / test new code features without affecting the stable
maincode.