Developing an application for CESSDA
Overview
Teaching: 25 min
Exercises: 20 minQuestions
How do we use CESSDA’s infrastructure to develop software?
Objectives
Understand the basic concepts behind version control.
Use Bitbucket to fork a CESSDA repository and clone it onto a local machine.
Build and run an exemplar application.
Understand the Git Feature Branch Workflow development model.
Develop a fix for the exemplar application within a repository developer branch.
Commit and contribute a fix upstream for the exemplar application.
In this episode, we develop a basic application using the CESSDA infrastructure …
A Brief Introduction to Version Control
Also known as revision control, source control, or source control management, at their simplest these are tools that tracks changes to files. As such, they maintain a complete history of all changes to the codebase, which has a number of advantages.
Advantage 1: A more efficient backup
Question: Who’s been in this situation?
Haven’t we all been in the situation where we end up with multiple and nearly identical versions of the same file with no meaningful explanation of the differences?
If we’re just dealing with Docs, some word processors let us deal with this a little better, like Microsoft Word (“Track Changes”) or Google Docs version history. BUT research isn’t just Words docs, it’s code and data and diagrams too.
Using version control means we don’t keep dozens of different versions of our files hanging about taking up space, and when we store a revision, we store an explanation of what changed. We’ll get into how to do this later!
Advantage 2: Reproducibility
When you use version control, at any point in the future, you can retrieve the correct versions of your documents, scripts or code. So, for example, a year after publication, you can get hold of the precise combination of scripts and data that you used to assemble a paper.
Version control makes reproducibility simpler. Without using version control it’s very hard to say that your research is truly reproducible.
Is it really science without version control?
“If you’re not using version control, whatever else you may be doing with a computer it isn’t science” - Greg Wilson, co-founder of Software Carpentry
Advantage 3: To aid collaboration
As well as maintaining a revison history, VC tools also help multiple authors collaborate on the same file or set of files.
- Professional software developers use VC work in large teams and to keep track of what they’ve done. They know who has changed what and when. And who to blame when things break!
- Every large software development project relies on VC, and most programmers use it for their small jobs as well.
- Version control is not just for software: papers, small data sets - anything that changes over time, or needs to be shared can, and probably should be stored in a version control system.
Which source code management system will we be using?
We’ll be using the Git source code management (SCM) system. Git was written by Linus Torvalds, maintainer of the Linux kernel, to essentially scratch his own itch, so if you think it’s idiosyncractic in places, you know who to blame.
Git is now the most widely used type of SCM and has found wider prominence partly through the rise of GitHub and Bitbucket - web based Git repository hosting services which simplify collaboration.
Distributed vs centralised SCM
There are two types of source code management systems:
- Centralised: a single master copy of the repository (the files under version control) exists - the only place where all revision history is kept. If you’re working as team you need to connect to the central server to store a revision, e.g. systems like SubVersion or CVS
- Distributed: each developer in a team has their own full copy of the repository which are then synchronised. You can use Git without a network connection and there’s no single point of failure, e.g. systems like Git or Mercurial
Requesting a CESSDA code repository
If you were to develop your own code within CESSDA you need to request a Bitbucket code repository to be created within CESSDA to host your code. Note that you need to have completed the CESSDA Research Infrastructure Contributor License Agreement form first. You can request a CESSDA code repository by using the CESSDA code repository form, where you supply:
- Your name
- Email address
- Bitbucket account name (which will be used to access the code repository)
- The name of your project or component
- A description of the project associated with the repository
- The coding language of your component
- Bitbucket account names of other contributors (who must also have filled in the Contributor License Agreement)
When submitted, the repository will be created and its details emailed to you so you can use it.
Finding and viewing our Fibonacci repository
First, log in to Bitbucket and go to the Fibonacci public CESSDA repository at https://bitbucket.org/cessda/cessda.ces2018.test. Here you’ll see the repository with number of other links, among which:
- Source: shows you the contents of this repository, which you’ll see in the main window
- Commits: a list of changes made to this repository
- Branches: a list of repository ‘branches’ - each is a separate set of commits, independent of other branches. We’ll touch on these a bit later
Forking the repository
A fork of a repository is a copy of it that you can work on privately without interfering with other collaborators working on that repository. This means you can ‘commit’ your local changes to that repository without breaking the official repository, and when ready, you can submit those changes ‘upstream’ to be merged into the official repository (the one it’s forked from). Working on repository forks is the expected way of working within CESSDA.
We’re now going to fork the repository that was created for you in Bitbucket and use the fork to work on the repository. Maintainers of the project can use branches in the official repository in place of forks during development, but ideally all contributors should use forks.
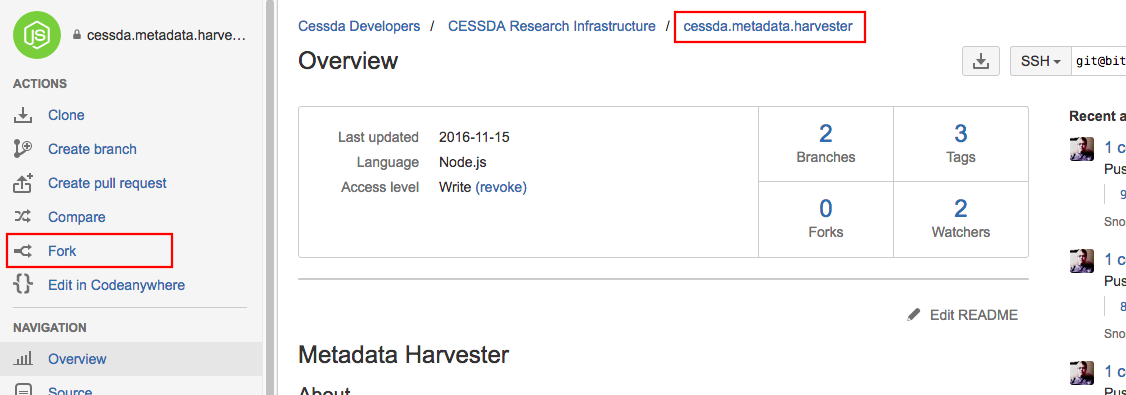
To fork your repository, select the ‘+’ icon on the far left navigation bar and select ‘Fork this repository’. When entering a name for the fork, keep the same name, and then select ‘Fork repository’. You should then see your copy of this repository appear, with some instructions on how to get started.
Cloning the repository
Now we have our repository fork we can download, or ‘clone’, it on our local machines to work on it.
Clone repo: via Git on the command line
First ensure you are in a suitable location, such as your home directory, so it’s easy to find later.
$ cd ~
Then, in the Bitbucket web interface, look for a ‘Clone’ button, select it, and copy the text that appears, which should say something like git clone https://bitbucket_username@bitbucket.org/bitbucket_username/cessda.ces2018.test.git. Note that bitbucket_username is just a placeholder here for your own Bitbucket username.
Now clone the repository to your local machine:
$ git clone https://bitbucket_username@bitbucket.org/bitbucket_username/cessda.ces2018.test.git
You should see something like:
Cloning into 'cessda.ces2018.test'...
remote: Counting objects: 58, done.
remote: Compressing objects: 100% (41/41), done.
remote: Total 58 (delta 18), reused 0 (delta 0)
Unpacking objects: 100% (58/58), done.
Clone repo: via SourceTree
We can do exactly the same in SourceTree, with the GUI tool doing the same things in the background. In the Bitbucket web interface, look for a ‘Clone’ button, select it, and copy the URL part of the text that appears, which should be something like https://bitbucket_username@bitbucket.org/cessda/cessda.ces2018.test.git. Note that bitbucket_username is just a placeholder here.
In the SourceTree main window, select ‘New…’, then ‘Clone from URL’, and enter info for the following fields (don’t worry about the advanced options at all):
- Source URL: paste in the copied repository URL
- Destination Path: accept the home directory default
- Name: keep this as the suggested default
When you select ‘Clone’, it will do the same operations as with using Git on the command line, and you’ll end up with a cessda.ces2018.test directory in your home directory.
In the tool, you’ll be presented with a list of recent commits (much like the ‘Commits’ page on the Bitbucket interface). Select ‘File status’ from the navigation bar on the left, which will show you a list of changes you make to the repository as you go.
Using our repository
Now let’s first take a look at our forked repository, then build and run the code to familiarise ourselves with it. Then we can make some changes.
What’s in the repository?
You should now see a new cessda.ces2018.test directory in your home directory. If we go into that directory and look around…
$ cd cessda.ces2018.test
$ ls
…we should see the same directory contents for what we saw on the Bitbucket source page for this repository.
Let’s look at the contents of this cloned repository.
$ ls
You should see:
CONTRIBUTORS.md Jenkinsfile LICENSE lib pom.xml src
Here we have the following files:
- CONTTRIBUTORS.md: a list of contributors to the codebase and contact details
- lib/: a directory which contains jUnit, a unit testing framework for building tests of our code which we’ll look at using later when we come to test our code
- pom.xml: a configuration file for Apache Maven, a project management tool we’ll use to build and test our Java code
- src/: a directory which contains source for for both a Fibonacci program and a single unit test for it
- Jenkinsfile: a file that tells the CESSDA CI server what to do for a Jenkins job
There is one that is missing, that is expected by CESSDA:
- README.md: which we would use to describe things like the project, any prerequisites, and how to build and run the code
If we have time, we’ll see about writing one and contributing it!
The Fibonacci scenario
Slide available
Let’s describe the scenario we’re going to use for this lesson. The Fibonacci sequence is a mathematically generated sequence of numbers, starting with 0 and 1, with each following number being an addition of the previous two numbers in the sequence, i.e.
0, 1, 1, 2, 3, 5, 8, 13, 21, 34, ..
We’ll use a Java program that gives you the Fibonacci number at a particular index (starting with 0) in the sequence, e.g. asking for the 6th number gives us 8.
Looking at the code
Let’s take a quick look at the code. In an editor, such as Nano, open src/main/java/math/Fibonacci.java.
$ nano src/main/java/math/Fibonacci.java
You should see:
package math;

// Copyright 2014 The University of Edinburgh.
// ...

/**
 * Fibonacci numbers class.
 */
public class Fibonacci
{
    /**
     * Calculate the Fibonacci number of the given integer.
     *
     * @param n
     * @return Fibonacci number.
     * @throws IllegalArgumentException if n is < 0.
     */
    public static int fib(int n)
    {
        if (n < 0)
        {
            throw new IllegalArgumentException("n must be >= 0");
        }
	      else if (n < 2)
	      {
            return n + 10;
	      }
        else
        {
            return fib(n - 1) + fib(n - 2);
        }
    }

    /** Print usage information. */
    public static void print_usage()
    {
        System.out.println("Usage: java math.Fibonacci N");
        System.out.println("  where N >= 0");
    }

    public static void main(String[] args)
    {
        if (args.length < 1)
        {
            print_usage();
            System.exit(1);
        }
        int n = Integer.parseInt(args[0]);
        if (n < 0)
        {
            print_usage();
            System.exit(2);
        }
        int fibonacci = Fibonacci.fib(n);
        System.out.print("fib(" + n + ") = " + fibonacci + "\n");
    }
}
So our Fibonacci code is a command line program that accepts a single argument that’s used to compute the Fibonacci number at that index and print it out.
Build our program
In order to run our Java program we need to compile (or more generally build) it first, for which we use Apache Maven, a project management tool. We also use it to run our tests, which we’ll look into later. Let’s have a quick look now.
$ cat pom.xml
The contents are:
<project xmlns=“http://maven.apache.org/POM/4.0.0” xmlns:xsi=“http://www.w3.org/2001/XMLSchema-instance”
 xsi:schemaLocation=“http://maven.apache.org/POM/4.0.0 http://maven.apache.org/xsd/maven-4.0.0.xsd”>
 <modelVersion>4.0.0</modelVersion>

 <groupId>math.Fibonacci</groupId>
 <artifactId>Fibonacci</artifactId>
 <version>1.0-SNAPSHOT</version>

 <properties>
   <maven.compiler.source>1.8</maven.compiler.source>
   <maven.compiler.target>1.8</maven.compiler.target>
 </properties>

 <dependencies>
   <dependency>
     <groupId>junit</groupId>
     <artifactId>junit</artifactId>
     <version>4.12</version>
     <scope>test</scope>
   </dependency>
 </dependencies>
</project>
Here we define some metadata for our Fibonacci program, the version of the Java compiler we’ll be using (1.8), and a single dependency on jUnit (which we’ll look at in the next lesson). Based on these properties, Maven can build the code and run tests for us.
For now, we’ll just focus on building our code, which we do using:
$ mvn compile
You should see something like:
[INFO] Scanning for projects...
[INFO]
[INFO] ------------------------------------------------------------------------
[INFO] Building Fibonacci 1.0-SNAPSHOT
[INFO] ------------------------------------------------------------------------
Downloading: https://repo.maven.apache.org/maven2/org/apache/maven/plugins/maven-resources-plugin/2.6/maven-resources-plugin-2.6.pom
Downloaded: https://repo.maven.apache.org/maven2/org/apache/maven/plugins/maven-resources-plugin/2.6/maven-resources-plugin-2.6.pom (8.1 kB at 12 kB/s)
Downloading: https://repo.maven.apache.org/maven2/org/apache/maven/plugins/maven-resources-plugin/2.6/maven-resources-plugin-2.6.jar
Downloaded: https://repo.maven.apache.org/maven2/org/apache/maven/plugins/maven-resources-plugin/2.6/maven-resources-plugin-2.6.jar (30 kB at 868 kB/s)
Downloading: https://repo.maven.apache.org/maven2/junit/junit/4.12/junit-4.12.pom
Downloaded: https://repo.maven.apache.org/maven2/junit/junit/4.12/junit-4.12.pom (24 kB at 1.2 MB/s)
[INFO]
[INFO] --- maven-resources-plugin:2.6:resources (default-resources) @ Fibonacci ---
Downloading: https://repo.maven.apache.org/maven2/org/apache/maven/shared/maven-filtering/1.1/maven-filtering-1.1.pom
Downloaded: https://repo.maven.apache.org/maven2/org/apache/maven/shared/maven-filtering/1.1/maven-filtering-1.1.pom (5.8 kB at 414 kB/s)
Downloading: https://repo.maven.apache.org/maven2/org/apache/maven/shared/maven-filtering/1.1/maven-filtering-1.1.jar
Downloaded: https://repo.maven.apache.org/maven2/org/apache/maven/shared/maven-filtering/1.1/maven-filtering-1.1.jar (43 kB at 2.4 MB/s)
[WARNING] Using platform encoding (UTF-8 actually) to copy filtered resources, i.e. build is platform dependent!
[INFO] skip non existing resourceDirectory /Users/user/Projects/SSI/cessda/cessda.ces2018.test/src/main/resources
[INFO]
[INFO] --- maven-compiler-plugin:3.1:compile (default-compile) @ Fibonacci ---
[INFO] Changes detected - recompiling the module!
[WARNING] File encoding has not been set, using platform encoding UTF-8, i.e. build is platform dependent!
[INFO] Compiling 1 source file to /Users/user/Projects/SSI/cessda/cessda.ces2018.test/target/classes
[INFO] ------------------------------------------------------------------------
[INFO] BUILD SUCCESS
[INFO] ------------------------------------------------------------------------
[INFO] Total time: 2.316 s
[INFO] Finished at: 2018-09-21T09:14:31+01:00
[INFO] Final Memory: 16M/216M
[INFO] ------------------------------------------------------------------------
Since Maven manages dependencies at project build time, it first downloads these before compiling the Java module (notice the one for jUnit). We can also see some build statistics. The important one for us is that the Java code was compiled into a class that’s in the target/classes directory:
$ ls target/classes/math/Fibonacci.class
target/classes/math/Fibonacci.class
Run the code
Now we’ve built it, we can run it:
$ java -cp target/classes math.Fibonacci
Usage: java math.Fibonacci N
  where N >= 0
So at least it’s doing some validation of our input for us.
$ java -cp target/classes math.Fibonacci 1
fib(1) = 11
Hmm… that doesn’t look right. It should be 1! In the next step we’ll look into how to fix this bug.
So that’s a quick tour of our forked repository, that we’ve cloned, built, and run.
Fixing our code
Let’s look at how we would make a fix to this code ourselves.
Working with branches
A commit is a coherent group of changes to a repository, which might include a modification to a file (e.g. for fixing a bug), adding a new file, or deleting an existing one.
We can see a recent list of commits (made before we created our fork) by doing:
$ git log
If using SourceTree…
You can view the log of commits by selecting the ‘master’ branch from the navigation bar.
You may remember we mentioned repository branches earlier. These are independent streams of work, each with their own separate sequence of ‘commits’. This means you can have alternative versions of source code files being worked on separately without disturbing changes of other branches. The list of commits shown above are for a ‘Master’ branch of our forked repository.
What’s generally recommended is to have a primary, or ‘Master’ branch, which always contains a tested and working version of the software, and at least one separate branch (e.g. ‘Develop’) where development - or in-progress - code is committed. Once it’s finished and fully tested, you then do a ‘Merge’ with the Master branch and the result of those commits get put into Master.
Let’s look at an example of how branches work in practice (slide available):

Here, we have three types of branches:
- Master: which holds official releases of the code, e.g. v0.1, v0.2, v1.0
- Develop: the work that is being done on the code to prepare for a future release. When ready and tested, it gets merged into master
- Feature: a type of development branch which is used to do development for a new feature of the software. When ready, it gets merged into the Develop branch
This is a typical way of working with Git repositories called the Feature Branch Workflow model.
In CESSDA, they expect at least that you make branches for separate issues you are working on. If you’re contributing to a repository that’s maintained by someone else, you shouldn’t be making changes to the Master branch at all.
For the purposes of simplicity for this training, our repository has just two branches, master and develop. But we’ll use these to operate in the same way as above.
Switching branches
In most cases when you clone a repository, you’ll find yourself on the Master branch. We can use git status to tell us which branch we’re currently on, as well as the current status of any changes we’ve made:
$ git status
And you should see:
On branch master
Your branch is up-to-date with 'origin/master'.
nothing to commit, working tree clean
Which tells us we’re on Master, and haven’t made any changes we need to commit.
If using SourceTree…
You can view the Git status by selecting ‘File status’ from the navigation bar (ensuring ‘master’ is still selected). It should be blank!
So, since we’ll be working on a fix, we’ll be working on the Develop branch. We can do that by checking out a branch in our local repository:
$ git checkout develop
And you should now see:
Branch develop set up to track remote branch develop from origin.
Switched to a new branch 'develop'
If using SourceTree…
You can switch to the ‘Develop’ branch by selecting ‘develop’ from the ‘Branches’ list on the navigation bar - notably this will change your branch on the command line.
So - now we’re on the Develop branch, which at this point is a copy of what is in the Master branch. And we’re now in the correct position to ‘commit’ any changes we make to the repository, like fixes to our code.
Exercise: Diagnose and fix the problem
Have a look at the source code for Fibonacci in
src/main/java/math/Fibonacci.javaand see if you can find the problem and correct it, then save the file. Recompile the code (mvn compile) and then manually run the code a few more times with different arguments to check the results of other inputs, e.g.:
$ java -cp target/classes math.Fibonacci 1
$ java -cp target/classes math.Fibonacci 2
$ java -cp target/classes math.Fibonacci 6…
Committing our fix to our local repo
Checking the status of our repository
Now we have a tested fix for our problem, we need to commit it to our local repository. Let first see what’s changed:
$ git status
This now tells us a bit more about what is going on:
On branch develop
Your branch is up-to-date with 'origin/develop'.
Changes not staged for commit:
  (use "git add <file>..." to update what will be committed)
  (use "git checkout -- <file>..." to discard changes in working directory)

	modified:   src/main/java/math/Fibonacci.java

no changes added to commit (use "git add" and/or "git commit -a")
We can also view the changes in more detail:
$ git diff
index c6ac64e..807f447 100644
--- a/src/main/java/math/Fibonacci.java
+++ b/src/main/java/math/Fibonacci.java
@@ -34,7 +34,7 @@ public class Fibonacci
         }
        else if (n < 2)
        {
-            return n + 10;
+            return n;
        }
        else
        {
If using SourceTree…
You can view the Git status by selecting ‘File status’ from the navigation bar (ensuring ‘develop’ is still selected). You should now see a changed view, showing you the differences you’re made in the code to the Java file.
So it’s picked up that we’ve made a modification to our Fibonacci code, as we may expect. git status will also pick up new files and deleted ones, not that we have any of those yet.
Why are some files missing from the modified list?
But interestingly, you’ll notice some things that have also changed that aren’t in this list of changes - notably, the creation of a target directory which stores our compiled code. So why isn’t this in the list of changes?
This is due to a file in our repository called .gitignore, a feature of Git we can use to ignore files and directories which shouldn’t be tracked for changes:
$ cat .gitignore
## Java

*.class
build
target
So in this case, all Java class files are ignored, as well as anything in build or target directories - it’s not considered good practice to commit intermediate or target binaries into a repository. CESSDA recommends selecting a suitable preconfigured one for whatever language(s) you are using from a set provided by GitHub.
Committing the fix
So now we know what is to be committed as a change, let’s do that now.
But first, let’s tell Git who we are:
git config --global user.name "Your Name"
git config --global user.email "email.used@by.bitbucket.account"
This will identify who has made the commit.
If using SourceTree…
You can change your commit identity by going to ‘Settings’ -> ‘Advanced’, unsetting the ‘Use global user settings’, and entering details for ‘Full Name’, ‘Email address’, and select ‘OK’.
Let’s also ensure that Git uses our Nano editor for creating a commit message (unless you are happy to use the vi editor, which is usually the one used by default). If using SourceTree, just using the command line for this is actually easier:
git config --global core.editor "nano"
The first thing we do is we let Git know we want to consider this change in the next commit:
git add src/main/java/math/Fibonacci.java
If there were any other files that had changes, we could also add these here.
Next, we then commit the change with a meaningful message describing the nature of the commit.
What’s a good commit message?
Seven posited rules of a great Git commit message are:
- Separate subject from body with a blank line
- Limit the subject to 50 characters
- Capitalize the subject line
- Do not end the subject line with a period
- Use the imperative mood in the subject line
- Wrap the body at 72 characters
- Use the body to explain what and why vs. how
Then, we can do the actual commit:
$ git commit src/main/java/math/Fibonacci.java
You’ll notice Nano pop up which allows you to enter your commit message. Enter something like the following:
Fix issue with incorrect Fibonacci result

Remove the incorrect addition of 10 to all final results
passed back from the recursive fib function.

# Please enter the commit message for your changes. Lines starting
# with '#' will be ignored, and an empty message aborts the commit.
# Explicit paths specified without -i or -o; assuming --only paths...
# On branch develop
# Your branch is up-to-date with 'origin/develop'.
#
# Changes to be committed:
#       modified:   src/main/java/math/Fibonacci.java
#
Once done, save and exit the editor. You’ve committed a change!
If using SourceTree…
Go to ‘File status’ on the navigation bar, and you should again see your changes. Ensure the file is selected, add your commit message in the bottom window, then select ‘Commit’.
Viewing a log of commits
Let’s now see our log of commits made to this branch:
$ git log
You should find, at the top of the list, the recent commit:
commit a87f5f901c4dcc3938a2ec62a54e5a389ce2fcf1
Author: bitbucket_username <bitbucket_user_email_address>
Date:   Fri Sep 21 14:28:09 2018 +0100

    Fix issue with incorrect Fibonacci result

    Remove the incorrect addition of 10 to all final results
    passed back from the recursive fib function

commit c8730ba03f76c62366847e132175ad1f1fb81cc6
Merge: 9550662 41cdc08
Author: Steve Crouch <s.crouch@software.ac.uk>
Date:   Fri Sep 21 10:38:45 2018 +0100
If using SourceTree…
You can view the log of commits by selecting the ‘develop’ branch from the navigation bar.
Generally, it is considered good practice to commit often and logically connected units of changes, in order to have a clear history that is easily understandable by others.
Push the changes to your forked repository
We now have our commit in place, but only within our local repository on our machine. We need to push these changes to our forked repository on Bitbucket:
$ git push
You should see something like the following:
Password for 'https://bitbucket_username@bitbucket.org':
Counting objects: 7, done.
Delta compression using up to 4 threads.
Compressing objects: 100% (4/4), done.
Writing objects: 100% (7/7), 573 bytes | 0 bytes/s, done.
Total 7 (delta 2), reused 0 (delta 0)
remote:
remote: Create pull request for develop:
remote:   https://bitbucket.org/bitbucket_username/cessda.ces2018.test/pull-requests/new?source=develop&t=1
remote:
To https://bitbucket.org/bitbucket_username/cessda.ces2018.test.git
   c8730ba..a87f5f9  develop -> develop
You’ll notice it suggests that we can make a pull request - this is the next bit we’ll do!
If using SourceTree…
You can push your changes by selecting ‘Push’ on the top menu, selecting the ‘develop’ branch only, then selecting ‘OK’. You’ll probably have to enter your Bitbucket password.
Now if we go to our Bitbucket repository on our browser, and select the ‘Commits’ link in the navigation bar on the left, we should see our commit sitting at the top of the list of repository commits, showing it occurred on the Develop branch.
Submit your fix to the official repository: The Pull Request
Now we have our commit in pur Bitbucket repository, we would like to submit that change to the repository’s maintainer for review, and eventually we hope, acceptance into the official project repository.
We do this via a pull request, which sends a notification to the maintainer that this change has been made on your forked repository, and it should be considered for review. If your changes are compatible with the master branch of the main repository and the tests pass, it can be merged in. If not you may be asked to resolve conflicts or other problems in your fork first.
We can submit this via the Bitbucket interface. Select ‘Pull requests’ from the navigation bar, and select ‘Create pull request’. What we want is to submit pull requests that will merge with the Develop branch on the official repository (since that’s what we’ve committed to). Importantly, you’ll see at the top of the page on the right, that the pull request, by default, will attempt to create a pull request for the Master branch on the official repository, so change the ‘master’ branch to ‘develop’. Also make sure that the destination repository is set to ‘cessda/cessda.ces2018.test’.
We can also see the list of commits that will be submitted (just the one in this case). We can add to the description we gave, and it is considered good practise to add “WIP” to the beginning of the pull request’s title, e.g. “WIP Fix issue with incorrect Fibonacci result”. When ready, select ‘Create pull request’ at the bottom right.
Once submitted, you should see a summary of the submitted pull request. At some point, the maintainer will go through a list of outstanding pull requests and either merge them into the official repository or decline them.
Resync our forked repository with any changes
Of course, it could be that others have submitted pull requests, perhaps for the same fix, and at some point our forked repository will go out of sync with the official one.
We can check the state of our forked repository against the official one by selecting the ‘+’ icon on the far left, and select ‘Compare branches or tags’. Ensure that the source is set to the cessda/cessda.ces2018.test repository, and the destination is set to bitbucket_user/cessda.ces2018.test, and both the branches are set to ‘develop’, and select ‘Compare’.
You should see you are ‘1 commit behind develop’. We need to resynchronise!
So we need to ensure our fork is also up to date with the official repository. We can do this in Git by:
- Adding a link in our cloned repository to the official repository
- Instructing Git to reset our repository to the state of that repository
- Pushing the synchronised state of the repository to our forked repository on Bitbucket
Note that this will erase all local commits and uncommitted work!
In a real environment, we could ask Bitbucket to do a merge from the changes in the official repository, but these might lead to merge conflicts which are (regrettably) beyond the scope of this training.
First, we’ll let Git know about the official repository. Our local clone already knows about our forked repository on Bitbucket, since we cloned it from there, but we’re adding the official one here too:
$ git remote add upstream https://bitbucket.org/cessda/cessda.ces2018.test
We’ll ask Git to fetch the changes to the official repository (but not yet apply them):
$ git fetch upstream
remote: Counting objects: 1, done.
remote: Total 1 (delta 0), reused 0 (delta 0)
Unpacking objects: 100% (1/1), done.
From https://bitbucket.org/cessda/cessda.ces2018.test
 * [new branch]      develop    -> upstream/develop
 * [new branch]      master     -> upstream/master
We now ask Git to reset the Develop branch of our local forked repository to Develop branch on the official repository:
$ git reset --hard upstream/develop
HEAD is now at 8f12134 Merged in cessda-user1/cessda.ces2018.test/develop (pull request #14)
So our local fork’s Develop branch is now in the same state as the official repository’s Develop branch.
We are now free to push these changes to our local fork to our repository on Bitbucket:
$ git push origin develop --force
Password for 'https://cessda-user1@bitbucket.org':
Counting objects: 8, done.
Delta compression using up to 4 threads.
Compressing objects: 100% (5/5), done.
Writing objects: 100% (8/8), 756 bytes | 0 bytes/s, done.
Total 8 (delta 2), reused 0 (delta 0)
remote:
remote: Create pull request for develop:
remote:   https://bitbucket.org/cessda-user1/cessda.ces2018.test/pull-requests/new?source=develop&t=1
remote:
To https://bitbucket.org/cessda-user1/cessda.ces2018.test.git
 + b4bd608...8f12134 develop -> develop (forced update)
If we look at our Java now, we’ll notice that it contains one of the accepted fixes for our problem.
We are now free to continue developing with the codebase. We could also do this for the Master branch, if there had been any changes there.
Start as you mean to go on
Many projects, particularly in academia, deal with things like software documentation, licensing, and sustainability late in the project lifecycle. But it’s often much harder to address these things later, and is often a rushed and incomplete process.
For community research infrastructures like CESSDA, which quite rightly define a set of best practice requirements your code needs to satisfy, you should make a start on achieving them early. This greatly increases your chances your software will be accepted by CESSDA, and in general, this is a solid approach to any software development in any case. Get into good habits early!
Key Points
Contribute code to an existing repository through a repository fork.
Use the Feature Branch Workflow for developing a contribution.
Always test your contribution before submitting it.
Use pull requests to submit repository contributions.
Resynchronise your forked repository to ensure you have any latest repository changes.